Android GridView Tutorial
In this Android GridView tutorial, you will build an app using a GridView and learn how to customize it to create a beautiful user interface.
android gridview tutorial Screen Rotation Compability
These days, people are always being told to relax, go off-grid and put their smartphones down. But where’s the fun in that? I’m here to encourage you not to get off the grid. Instead, get onto our grid—our Android
GridView tutorial, that is!
Today you’ll learn how to tame this widely-used Android component and construct your own Bookcase application containing various books for babies.
If you’re familiar with Android’s
ListView component, you should feel right at home here. We also have a great tutorial on ListViews if you’d like to familiarize yourself with them first (although you don’t need to for this tutorial).GridView follows the same formula to render each cell. Basically, you:- Create a
BaseAdaptersubclass. - Set an instance of this class as your data provider to the
GridView. - Return each cell’s view from
getView()on your adapter.
Android’s
GridView is a useful component for constructing easy-to-browse lists. And since grids are everywhere these days (notably in the Instagram app) it’s a necessary skill. After completing this tutorial, you’ll be ready to conquer the world with your own amazing grid views!Getting Started
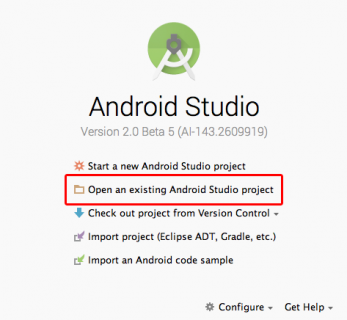
Download the starter project here. Included are the image assets for each book and a list of Book objects describing the contents of our Baby Bookcase. Open the project by starting Android Studio and selecting Open an existing Android Studio project:
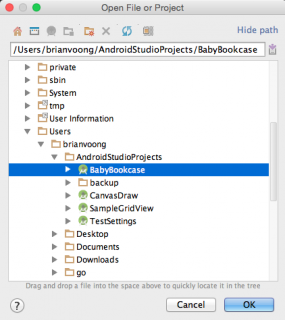
Navigate to the directory where you unzipped the sample project and hit OK:
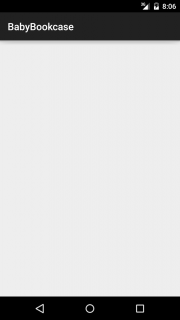
Build and run the project on your preferred emulator or Android device—you should see the most amazing blank screen ever:
You are now ready to start integrating your
GridView.
Navigate to app\res\layout\activity_main.xml and insert the following block of XML between the
RelativeLayout tags (make sure to view the file as “Text” by clicking the tab near the bottom):<GridView
android:id="@+id/gridview"
android:layout_width="match_parent"
android:layout_height="match_parent"
android:gravity="center"
android:columnWidth="100dp"
android:numColumns="auto_fit"
android:verticalSpacing="24dp"
android:horizontalSpacing="10dp"
android:stretchMode="spacingWidthUniform"
/>
Your editor should now show a preview of your
GridView: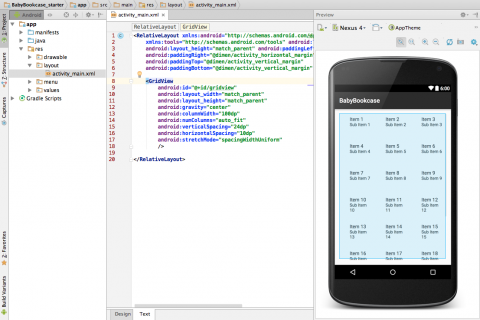
The snippet above specifies a
GridView with some customized properties. We’ll discuss property customization in more detail later on.Setting The Data Provider
Empty grids are hungry for data to display. To feed this one, you’ll set up a class called
BooksAdapter, an adapter which is a subclass of the BaseAdapter class, as your data provider for the GridView. In the project navigator pane, right-click on com.raywenderlich.babybookcase, and select New/Java Class. After that, type in BooksAdapter for Name, keep Class for Kind, and hit OK.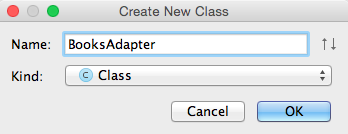
The adapter acts as the middleman between the
GridView and the data source. It loads the information to be displayed in your grid view from a data source, such as an array or database query, then creates a view for each item. If you’re interested, the ListView tutorial has more information on adapters.
Replace the contents of this file with the following:
package com.raywenderlich.babybookcase;

import android.content.Context;
import android.view.View;
import android.view.ViewGroup;
import android.widget.BaseAdapter;
import android.widget.TextView;

public class BooksAdapter extends BaseAdapter {

  private final Context mContext;
  private final Book[] books;

  // 1
  public BooksAdapter(Context context, Book[] books) {
    this.mContext = context;
    this.books = books;
  }

  // 2
  @Override
  public int getCount() {
    return books.length;
  }

  // 3
  @Override
  public long getItemId(int position) {
    return 0;
  }

  // 4
  @Override
  public Object getItem(int position) {
    return null;
  }

  // 5
  @Override
  public View getView(int position, View convertView, ViewGroup parent) {
    TextView dummyTextView = new TextView(mContext);
    dummyTextView.setText(String.valueOf(position));
    return dummyTextView;
  }

}
Here’s the play-by-play of each step in the above code:
- You use this constructor to instantiate a
BooksAdapter. - You return the number of cells to render here.
- You don’t need to return an
idfor this tutorial, so just return0. Android still requires you to provide an implementation for this method. - See #3, but instead return
null. - You return a dummy
TextViewas the cell view for yourGridView.
Now that you have a basic adapter implementation, you can use this class as the data provider for the
GridView in MainActivity. Within onCreate() in MainActivity.java, underneathsetContentView(R.layout.activity_main);
insert the following:
GridView gridView = (GridView)findViewById(R.id.gridview);
BooksAdapter booksAdapter = new BooksAdapter(this, books);
gridView.setAdapter(booksAdapter);
Build and run. You should see something like this:
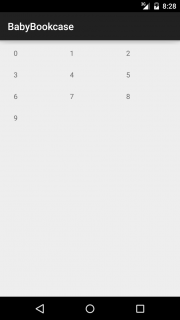
Great—we’re getting somewhere!
To provide the proper view for the cells that represent each
Book object, create a new XML layout file by right-clicking on the layout directory and selecting New/Layout resource file: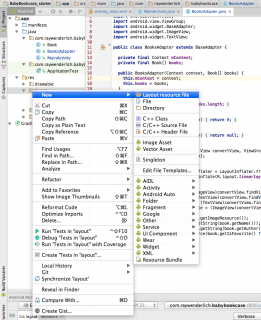
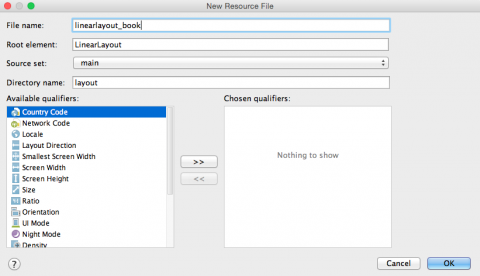
Use linearlayout_book as the file name and hit OK:
Replace the file contents with the following:
<LinearLayout xmlns:android="http://schemas.android.com/apk/res/android"
              xmlns:tools="http://schemas.android.com/tools"
              android:orientation="vertical" android:layout_width="match_parent"
              android:layout_height="match_parent"
              android:gravity="center"
    >

    <FrameLayout
        android:layout_width="wrap_content"
        android:layout_height="wrap_content">

        <ImageView
            android:id="@+id/imageview_cover_art"
            android:layout_width="wrap_content"
            android:layout_height="wrap_content"
            android:scaleType="centerCrop"/>

        <ImageView
            android:id="@+id/imageview_favorite"
            android:layout_width="24dp"
            android:layout_height="24dp"
            android:src="@drawable/star_disabled"
            android:layout_gravity="bottom|right"/>

    </FrameLayout>

    <TextView
        android:id="@+id/textview_book_name"
        android:layout_width="wrap_content"
        android:layout_height="wrap_content"
        android:textSize="12sp"
        tools:text="Are You My Mother"
        android:textStyle="bold"
        android:paddingTop="4dp"
        android:paddingLeft="8dp"
        android:paddingRight="8dp"
        android:gravity="center_horizontal"/>

    <TextView
        android:id="@+id/textview_book_author"
        android:layout_width="wrap_content"
        android:layout_height="wrap_content"
        android:textSize="12sp"
        tools:text="Dr. Seuss"
        android:gravity="center_horizontal"/>

</LinearLayout>
This new layout file will be used to represent your
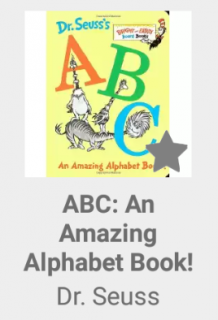
Book objects inside the grid. Each book will be drawn inside a cell that contains four items:- An
ImageViewfor the cover art. - Another
ImageViewfor a “favorited” star icon. - A
TextViewfor the book name. - Another
TextViewfor the book’s author.
Here’s a sample of what a book cell will look like:
Now that your layout is established, you can return a more complex view for your cells. Open BooksAdapter.java again and finish the implementation of
getView()by replacing it with the following:@Override
public View getView(int position, View convertView, ViewGroup parent) {
// 1
final Book book = books[position];
// 2
if (convertView == null) {
final LayoutInflater layoutInflater = LayoutInflater.from(mContext);
convertView = layoutInflater.inflate(R.layout.linearlayout_book, null);
}
// 3
final ImageView imageView = (ImageView)convertView.findViewById(R.id.imageview_cover_art);
final TextView nameTextView = (TextView)convertView.findViewById(R.id.textview_book_name);
final TextView authorTextView = (TextView)convertView.findViewById(R.id.textview_book_author);
final ImageView imageViewFavorite = (ImageView)convertView.findViewById(R.id.imageview_favorite);
// 4
imageView.setImageResource(book.getImageResource());
nameTextView.setText(mContext.getString(book.getName()));
authorTextView.setText(mContext.getString(book.getAuthor()));
return convertView;
}
Here’s an explanation of each step:
- You find the proper book for this cell by using the
positionindex. GridViewoptimizes memory usage by recycling the cells. This means that ifconvertViewis null, you instantiate a new cell view by using aLayoutInflaterand inflating your linearlayout_book layout.- You create references for each individual view you created in your XML layout file.
- You set the book’s cover art, name and author using the above references.
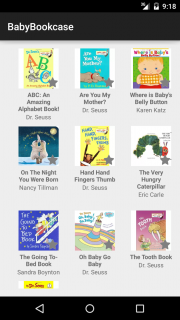
Build and run the application again. You should see the following:
Selecting Items
Now you’ve got a pretty grid of books. Hooray! But what if your user wants to favorite a book by tapping on it? To allow this, set up an on-click listener for your
GridView. Open MainActivity.java and add the following snippet at the bottom of onCreate():gridView.setOnItemClickListener(new AdapterView.OnItemClickListener() {
@Override
public void onItemClick(AdapterView parent, View view, int position, long id) {
Book book = books[position];
book.toggleFavorite();
// This tells the GridView to redraw itself
// in turn calling your BooksAdapter's getView method again for each cell
booksAdapter.notifyDataSetChanged();
}
});
A variable must be declared as
final to be used inside an anonymous nested class (like our on-click listener), so to change the booksAdapter variable’s declaration to final, replace this line in onCreate():BooksAdapter booksAdapter = new BooksAdapter(this, books);
with:
final BooksAdapter booksAdapter = new BooksAdapter(this, books);
To toggle the star icon in your cell, add this line of code in
getView in BooksAdapter, right before you return the convertView:imageViewFavorite.setImageResource(
book.getIsFavorite() ? R.drawable.star_enabled : R.drawable.star_disabled);
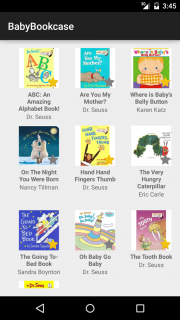
Build and run. You can now tap on each book to favorite your selections:
Screen Orientation Changes
You’ve happily selected some favorite books … but when you rotate the screen (CTRL + F11 for emulator rotation), the selections aren’t remembered. What!?

This is because Android Activities are destroyed and then recreated when the screen rotates. By default, the system uses the
Bundle instance state to save information about each View object in your activity layout (such as the text displayed in the TextViews of your GridView). When your activity instance is destroyed and recreated, the state of the layout is restored to its previous state with no code required by you.
This means that to make the selections behave correctly, you need to save the selection information yourself. Thankfully, Android Activities have two useful methods for this:
onSaveInstanceState(): Android will call this method right before the activity is destroyed.onRestoreInstanceState(): Android will call this method when recreating the activity.
To remember the selected books, the app needs to save the selection information to a list, then use that list to select the books when the activity is recreated.
First, establish an identifying key for the list at the beginning of your class by adding the following line before
onCreate() in MainActivity.java:private static final String favoritedBookNamesKey = "favoritedBookNamesKey";
Add the following to MainActivity.java under
onCreate():@Override
protected void onSaveInstanceState(Bundle outState) {
super.onSaveInstanceState(outState);
// construct a list of books you've favorited
final ArrayList<Integer> favoritedBookNames = new ArrayList<>();
for (Book book : books) {
if (book.getIsFavorite()) {
favoritedBookNames.add(book.getName());
}
}
// save that list to outState for later
outState.putIntegerArrayList(favoritedBookNamesKey, favoritedBookNames);
}
To restore the selections when the activity is recreated, add the following to MainActivity.java under
onSaveInstanceState():@Override
protected void onRestoreInstanceState(Bundle savedInstanceState) {
super.onRestoreInstanceState(savedInstanceState);
// get our previously saved list of favorited books
final ArrayList<Integer> favoritedBookNames =
savedInstanceState.getIntegerArrayList(favoritedBookNamesKey);
// look at all of your books and figure out which are the favorites
for (int bookName : favoritedBookNames) {
for (Book book : books) {
if (book.getName() == bookName) {
book.setIsFavorite(true);
break;
}
}
}
}
Build and run. Now when you rotate the screen, your books are still favorited!
Customizing GridView Properties
As you play around with the
GridView component, you may run into situations where the layout doesn’t suit your design perfectly. Luckily, the great folks at Google have provided a few properties that allow you to tweak how each cell is rendered.
You can modify
columnWidth, horizontalSpacing and verticalSpacing with a dimension value such as 14.5dp. These properties can be set programmatically or from the XML layout files.
To find properties to set, type
gridView.set at the bottom of onCreate() in MainActivity.java and wait for Android Studio to show suggestions.
Alternatively, take a look at the GridView documentation for a list of available methods, some of which set these properties. You can also head back to app/res/layout/activity_layout.xml and play around with the properties within the
GridView tag. The properties are fairly self-explanatory, so I definitely encourage you to experiment with different values.
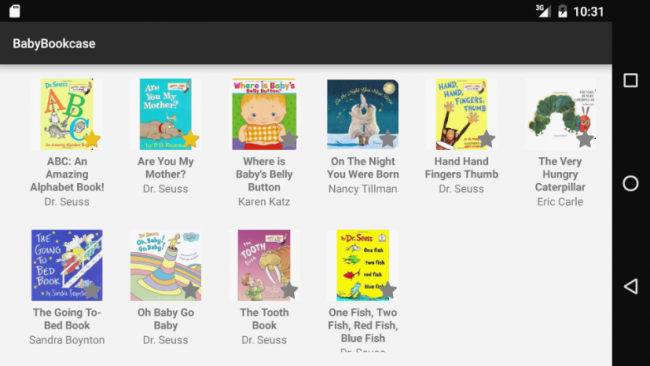
To specify the number of columns to render, provide an integer value for the property
numColumns. If you want to display as many columns as possible to fill the available horizontal space, use numColumns="auto_fit". Here’s a comparison between the two options in landscape orientation (I’ve used darker grey cell backgrounds for clarity purposes):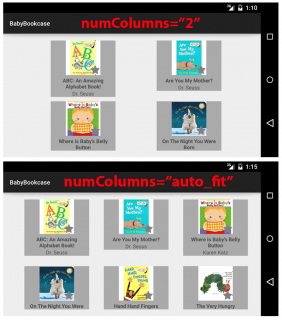
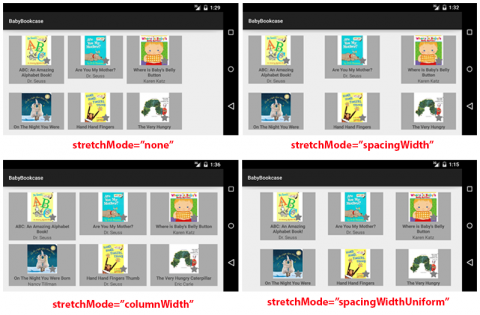
Finally, to control how your columns stretch to fill available space, specify
stretchMode as one of the following:none: Stretching is disabled.spacingWidth: Spacing between each column is stretched.columnWidth: Each column is stretched equally.spacingWidthUniform: Spacing between each column is uniformly stretched.
The following screenshot illustrates those options:
Using the customizable properties, you can easily get your
GridView looking just the way you want it!Performance Tips
Your first few implementations of
GridView will likely be simple in terms of view layouts, but as your app scales and you get more content, the stress on your users’ devices can become quite high in terms of loading cells and maintaining smooth scrolling.
The current implementation of this sample app recycles each cell view as needed within
BooksAdapter.getView(), so make sure to use this strategy whenever you need to provide views for your cells.
One technique to improve performance is called the ViewHolder design pattern. As the name suggests, you implement a class to “hold” the subviews inside of your cells. This avoids memory-expensive calls to
findViewById().
To see what this pattern looks like, add this private class inside
BooksAdapter, directly below getView(). Remember to paste inside the BooksAdapter class brackets! // Your "view holder" that holds references to each subview
private class ViewHolder {
private final TextView nameTextView;
private final TextView authorTextView;
private final ImageView imageViewCoverArt;
private final ImageView imageViewFavorite;
public ViewHolder(TextView nameTextView, TextView authorTextView, ImageView imageViewCoverArt, ImageView imageViewFavorite) {
this.nameTextView = nameTextView;
this.authorTextView = authorTextView;
this.imageViewCoverArt = imageViewCoverArt;
this.imageViewFavorite = imageViewFavorite;
}
}
Your
ViewHolder is quite simple. It holds references to each subview and doesn’t bother with anything else.
To take advantage of your
ViewHolder, change getView() to the following:@Override
public View getView(int position, View convertView, ViewGroup parent) {
final Book book = books[position];
// view holder pattern
if (convertView == null) {
final LayoutInflater layoutInflater = LayoutInflater.from(mContext);
convertView = layoutInflater.inflate(R.layout.linearlayout_book, null);
final ImageView imageViewCoverArt = (ImageView)convertView.findViewById(R.id.imageview_cover_art);
final TextView nameTextView = (TextView)convertView.findViewById(R.id.textview_book_name);
final TextView authorTextView = (TextView)convertView.findViewById(R.id.textview_book_author);
final ImageView imageViewFavorite = (ImageView)convertView.findViewById(R.id.imageview_favorite);
final ViewHolder viewHolder = new ViewHolder(nameTextView, authorTextView, imageViewCoverArt, imageViewFavorite);
convertView.setTag(viewHolder);
}
final ViewHolder viewHolder = (ViewHolder)convertView.getTag();
viewHolder.imageViewCoverArt.setImageResource(book.getImageResource());
viewHolder.nameTextView.setText(mContext.getString(book.getName()));
viewHolder.authorTextView.setText(mContext.getString(book.getAuthor()));
viewHolder.imageViewFavorite.setImageResource(book.getIsFavorite() ? R.drawable.star_enabled : R.drawable.star_disabled);
return convertView;
}
The
ViewHolder is stuffed into convertView‘s tag using setTag() and retrieved using getTag(). With your cells scrolling by, it helps them load quick quickly when they can skip over all the inflation, right to the getTag() call and the fun part of inserting content.
Build and run. Your app will look the same, but underneath the hood it is now capable of handling much faster view recycling.
For additional documentation, visit Google’s page on smooth scrolling here.
Remote Image Loading
What if your application requires loading external images inside each individual cell? This task generally requires subclassing
AsyncTask and firing off an image download task for each cell as the user scrolls down the list and back up.
Having implemented a custom solution for this in the past, I can tell you that it gets complicated. For example, you’d need to cache images in memory as each download is successfully completed, while making sure you’re not firing off multiple download tasks for the same image file download.
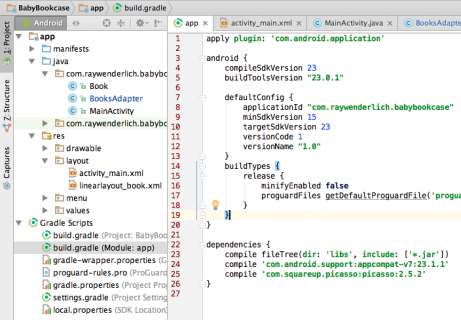
Fortunately, there is a fantastic library available from Square called Picasso that solves many of the common issues with list views and image downloads. To install the library, open up build.grade (Module: app) in your project and add the following line of code inside
dependencies:dependencies {
...
compile 'com.squareup.picasso:picasso:2.5.2'
}
Your build file should look like this:
Next, click the Sync Now link to install Picasso and update your project:
After successfully syncing your project, you can let Picasso do all the heavy lifting of downloading your images. To do this, comment out the line in
BooksAdapter.getView() where the cover art is set and include Picasso like this:// make sure to comment out this image setter
//viewHolder.imageViewCoverArt.setImageResource(book.getImageResource());
Picasso.with(mContext).load(book.getImageUrl()).into(viewHolder.imageViewCoverArt);
Build and run, then scroll through the GridView to test the external image loading. Note that the images are still the same for each book, but they are coming from a remote URL now.
Where to Go From Here
Congratulations! You’ve conquered the powerful
GridView component, created a library for your favorite kids’ books and learned how to do the following:- Add a
GridViewto your layouts. - Create an adapter to provide your
GridViewwith the proper cell views. - React to item selections.
- Persist selections for orientation changes.
- Customize the
GridView. - Optimize performance.
You can download the completed project here. If you’re curious about what else you can do with
GridViews, check out Google’s documentation.
I hope you’ve enjoyed this introduction to Android’s
GridView. If you have any questions, comments or feedback please join the forum discussion below.
Comments
Post a Comment